How to use LuNotification
The LuBase central hub is the heart of the LuON smart home, fully compatible with Apple Home in a way that no one else in the world has yet achieved. This allows LuON to offer features unavailable elsewhere, including the ability to create custom notifications that can be used in Apple Home automations. Wondering how to create such notifications and use them in your Apple Home system? This guide is made just for you.
Central hub and LuHome app
To create your own notifications and use them in Apple Home automations, you only need two things: the LuBase hub and the free LuHome app, which can be downloaded from the App Store on an iPhone, iPad, or a macOS (with an M1 processor or newer). After connecting the hub to power and the local network, add it to Apple Home by scanning the Apple Home code located on the bottom of the device using the LuHome app. Once the hub is configured, all the advanced features of the luonOS system, including the ability to create your own notifications—LuNotification, will be unlocked in the LuHome app.
Configuring notifications
When you first open the LuNotification tab, you will be asked to consent to receive notifications and critical notifications. Without this consent, enabling LuNotification will not be possible. If you accidentally denied this consent, go to the system settings, find the LuHome app, and click on the notifications tab.
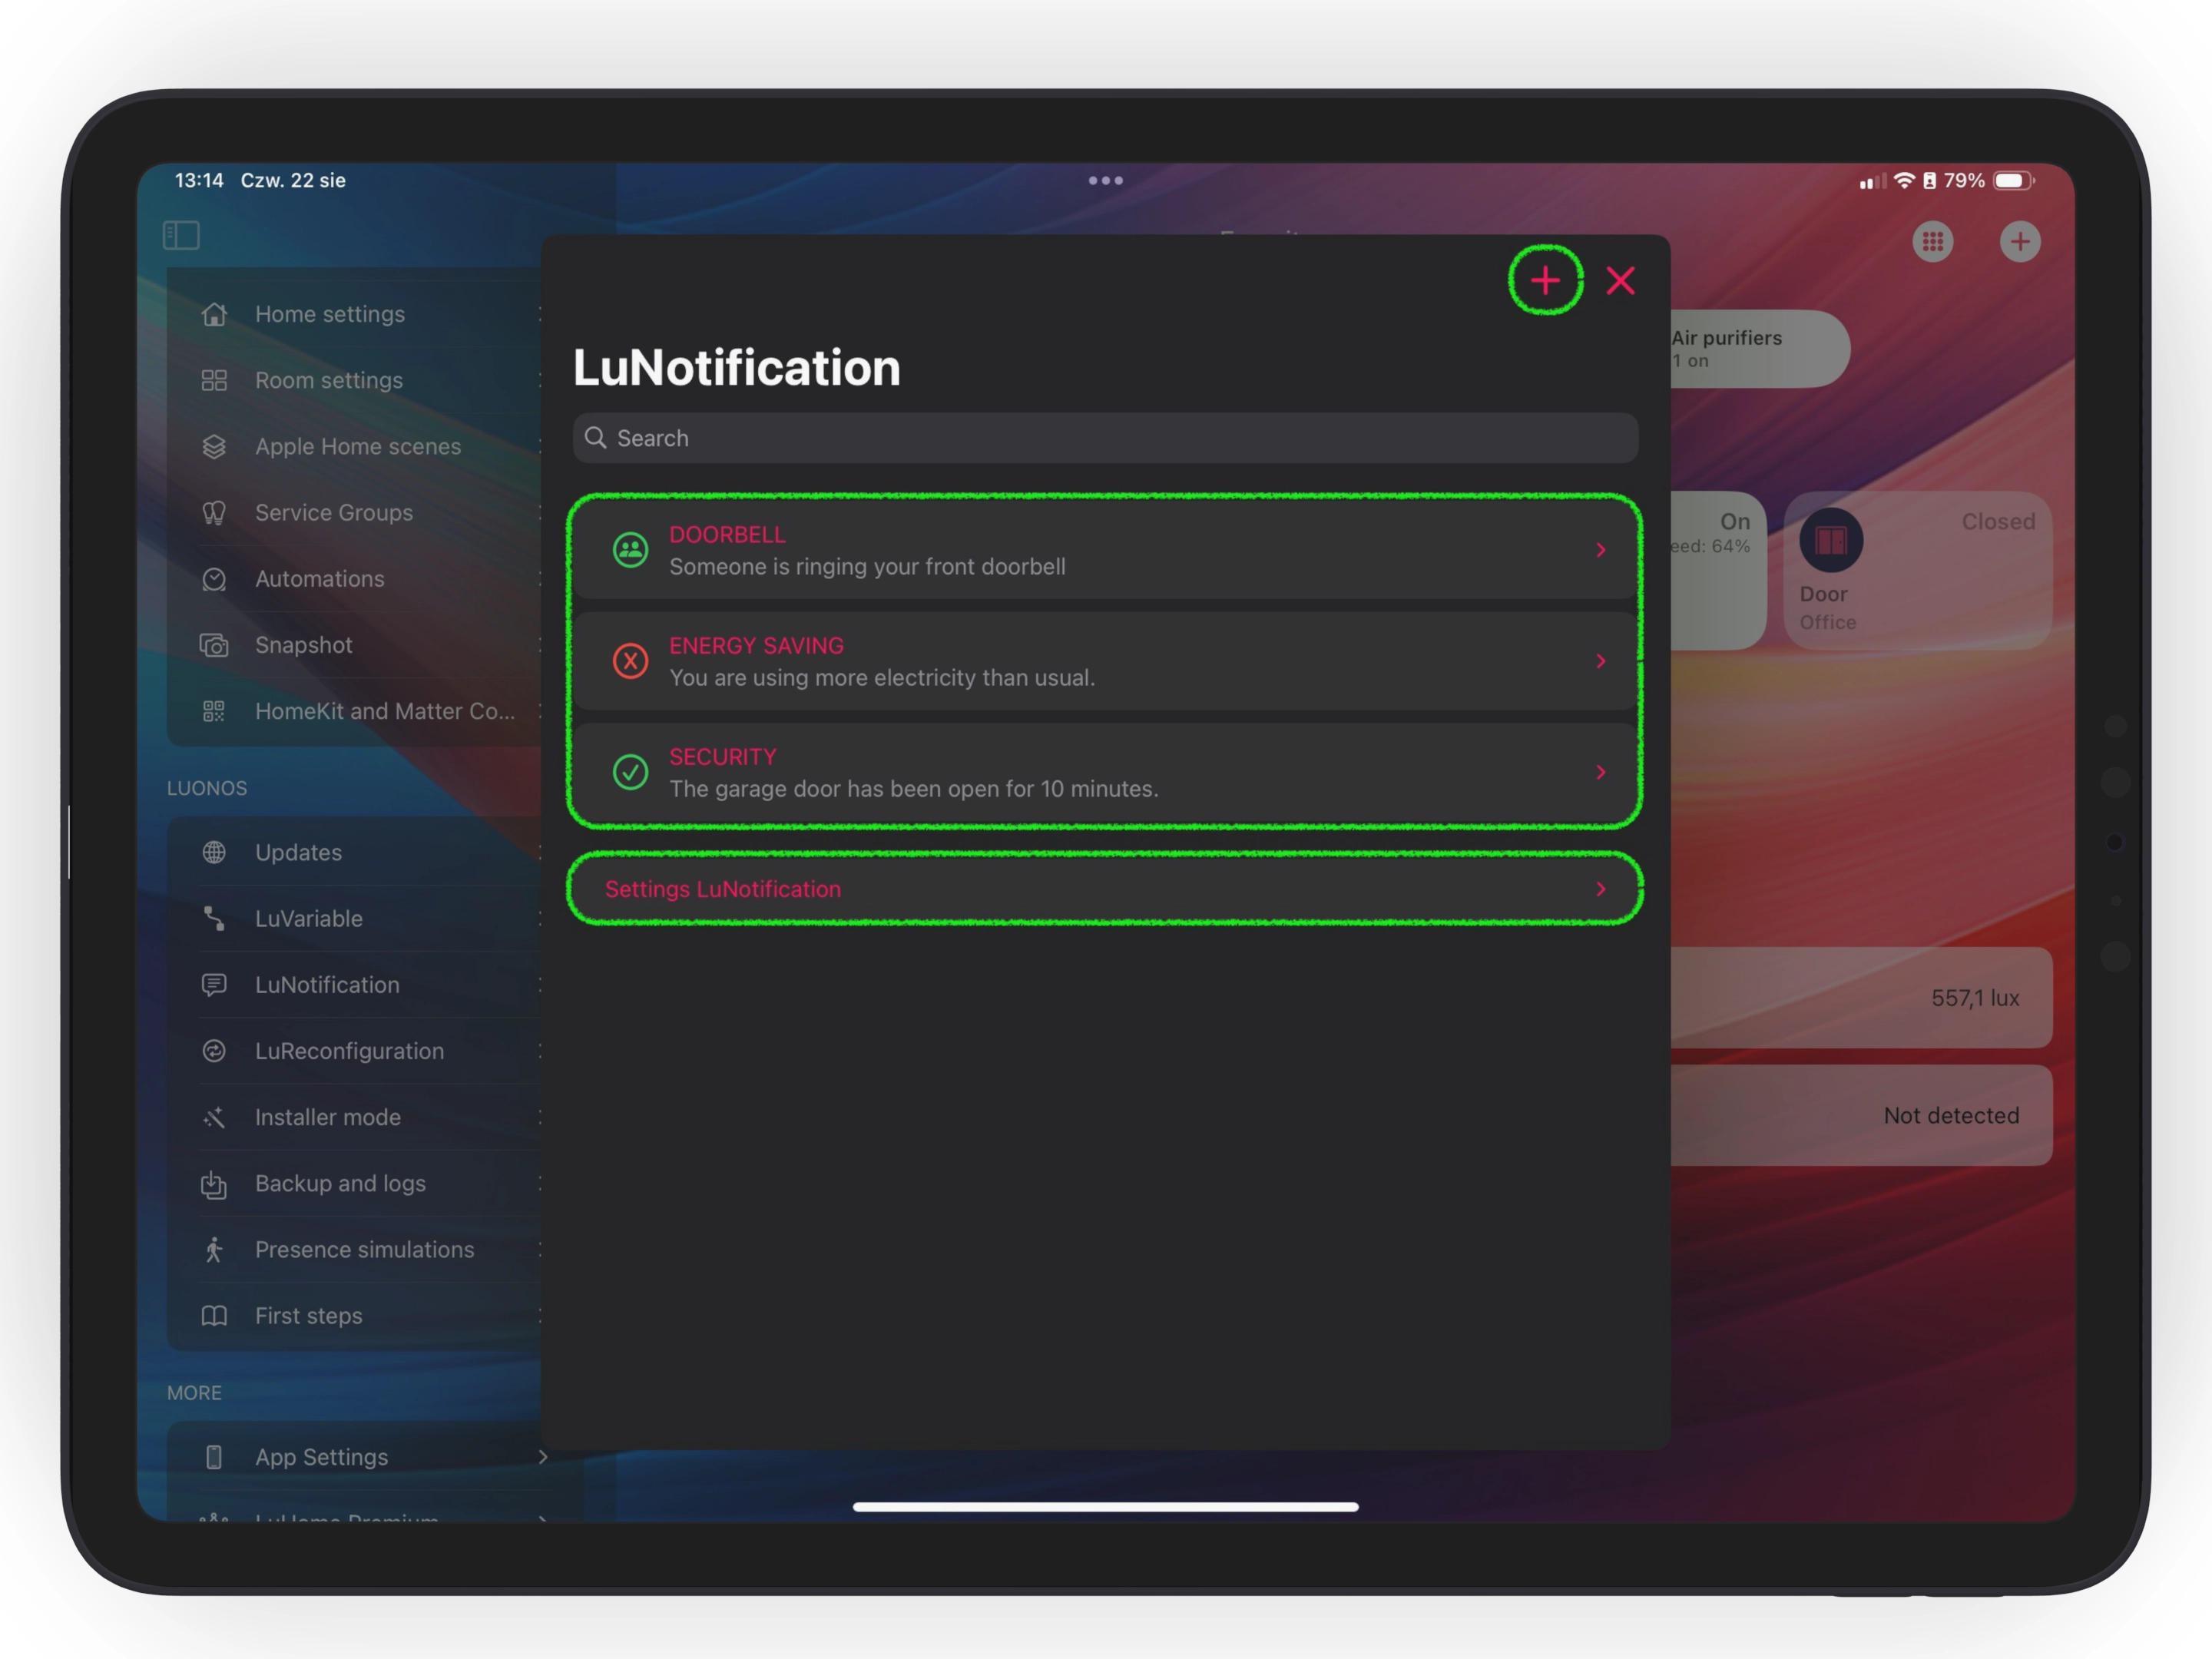
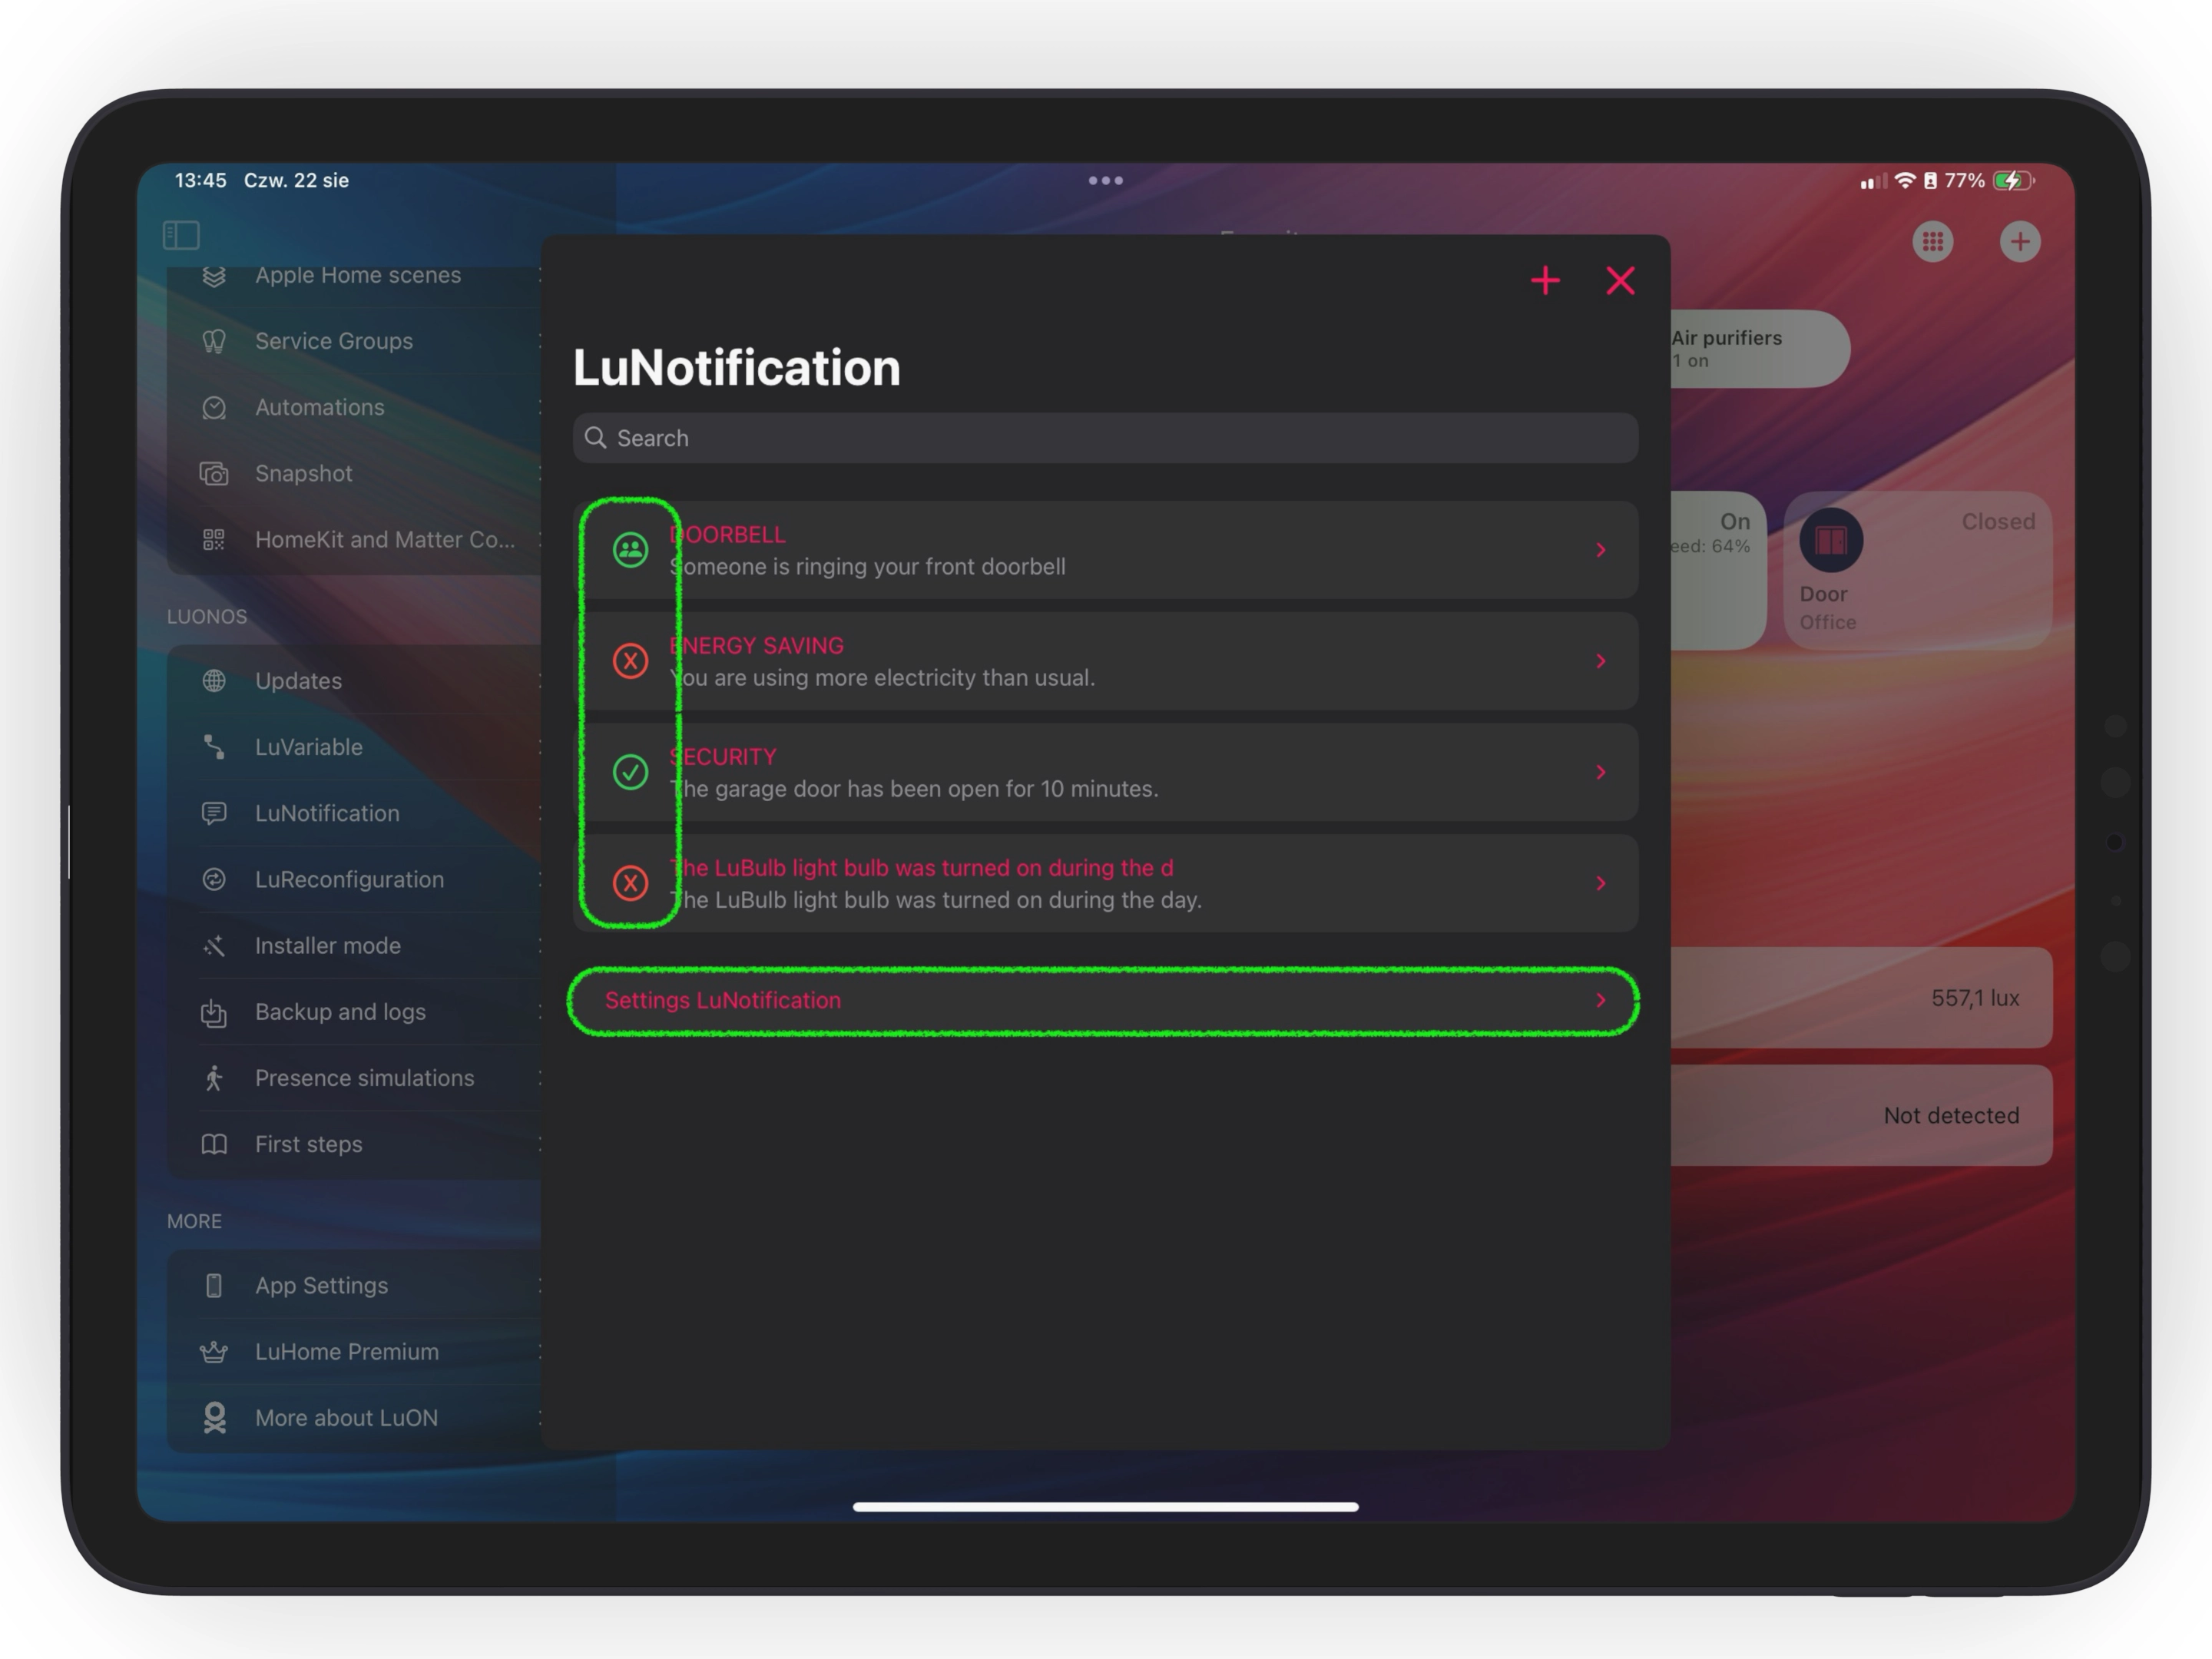
After giving your consent, you will see a view that allows you to easily manage multiple notifications. This view contains three important elements: adding new notifications, the notification list, and settings. For now, we will focus on creating new notifications.
Creating your own notification
When creating a notification, you can give it your own title and content. Remember, the title can have up to 48 characters, and the content can have up to 256 characters. If you have any doubts, click the ⓘ icon on the right-hand side of the interface. After setting the content, proceed to choose the type and category of the notification. This is crucial because they determine where and how the notification will reach you.
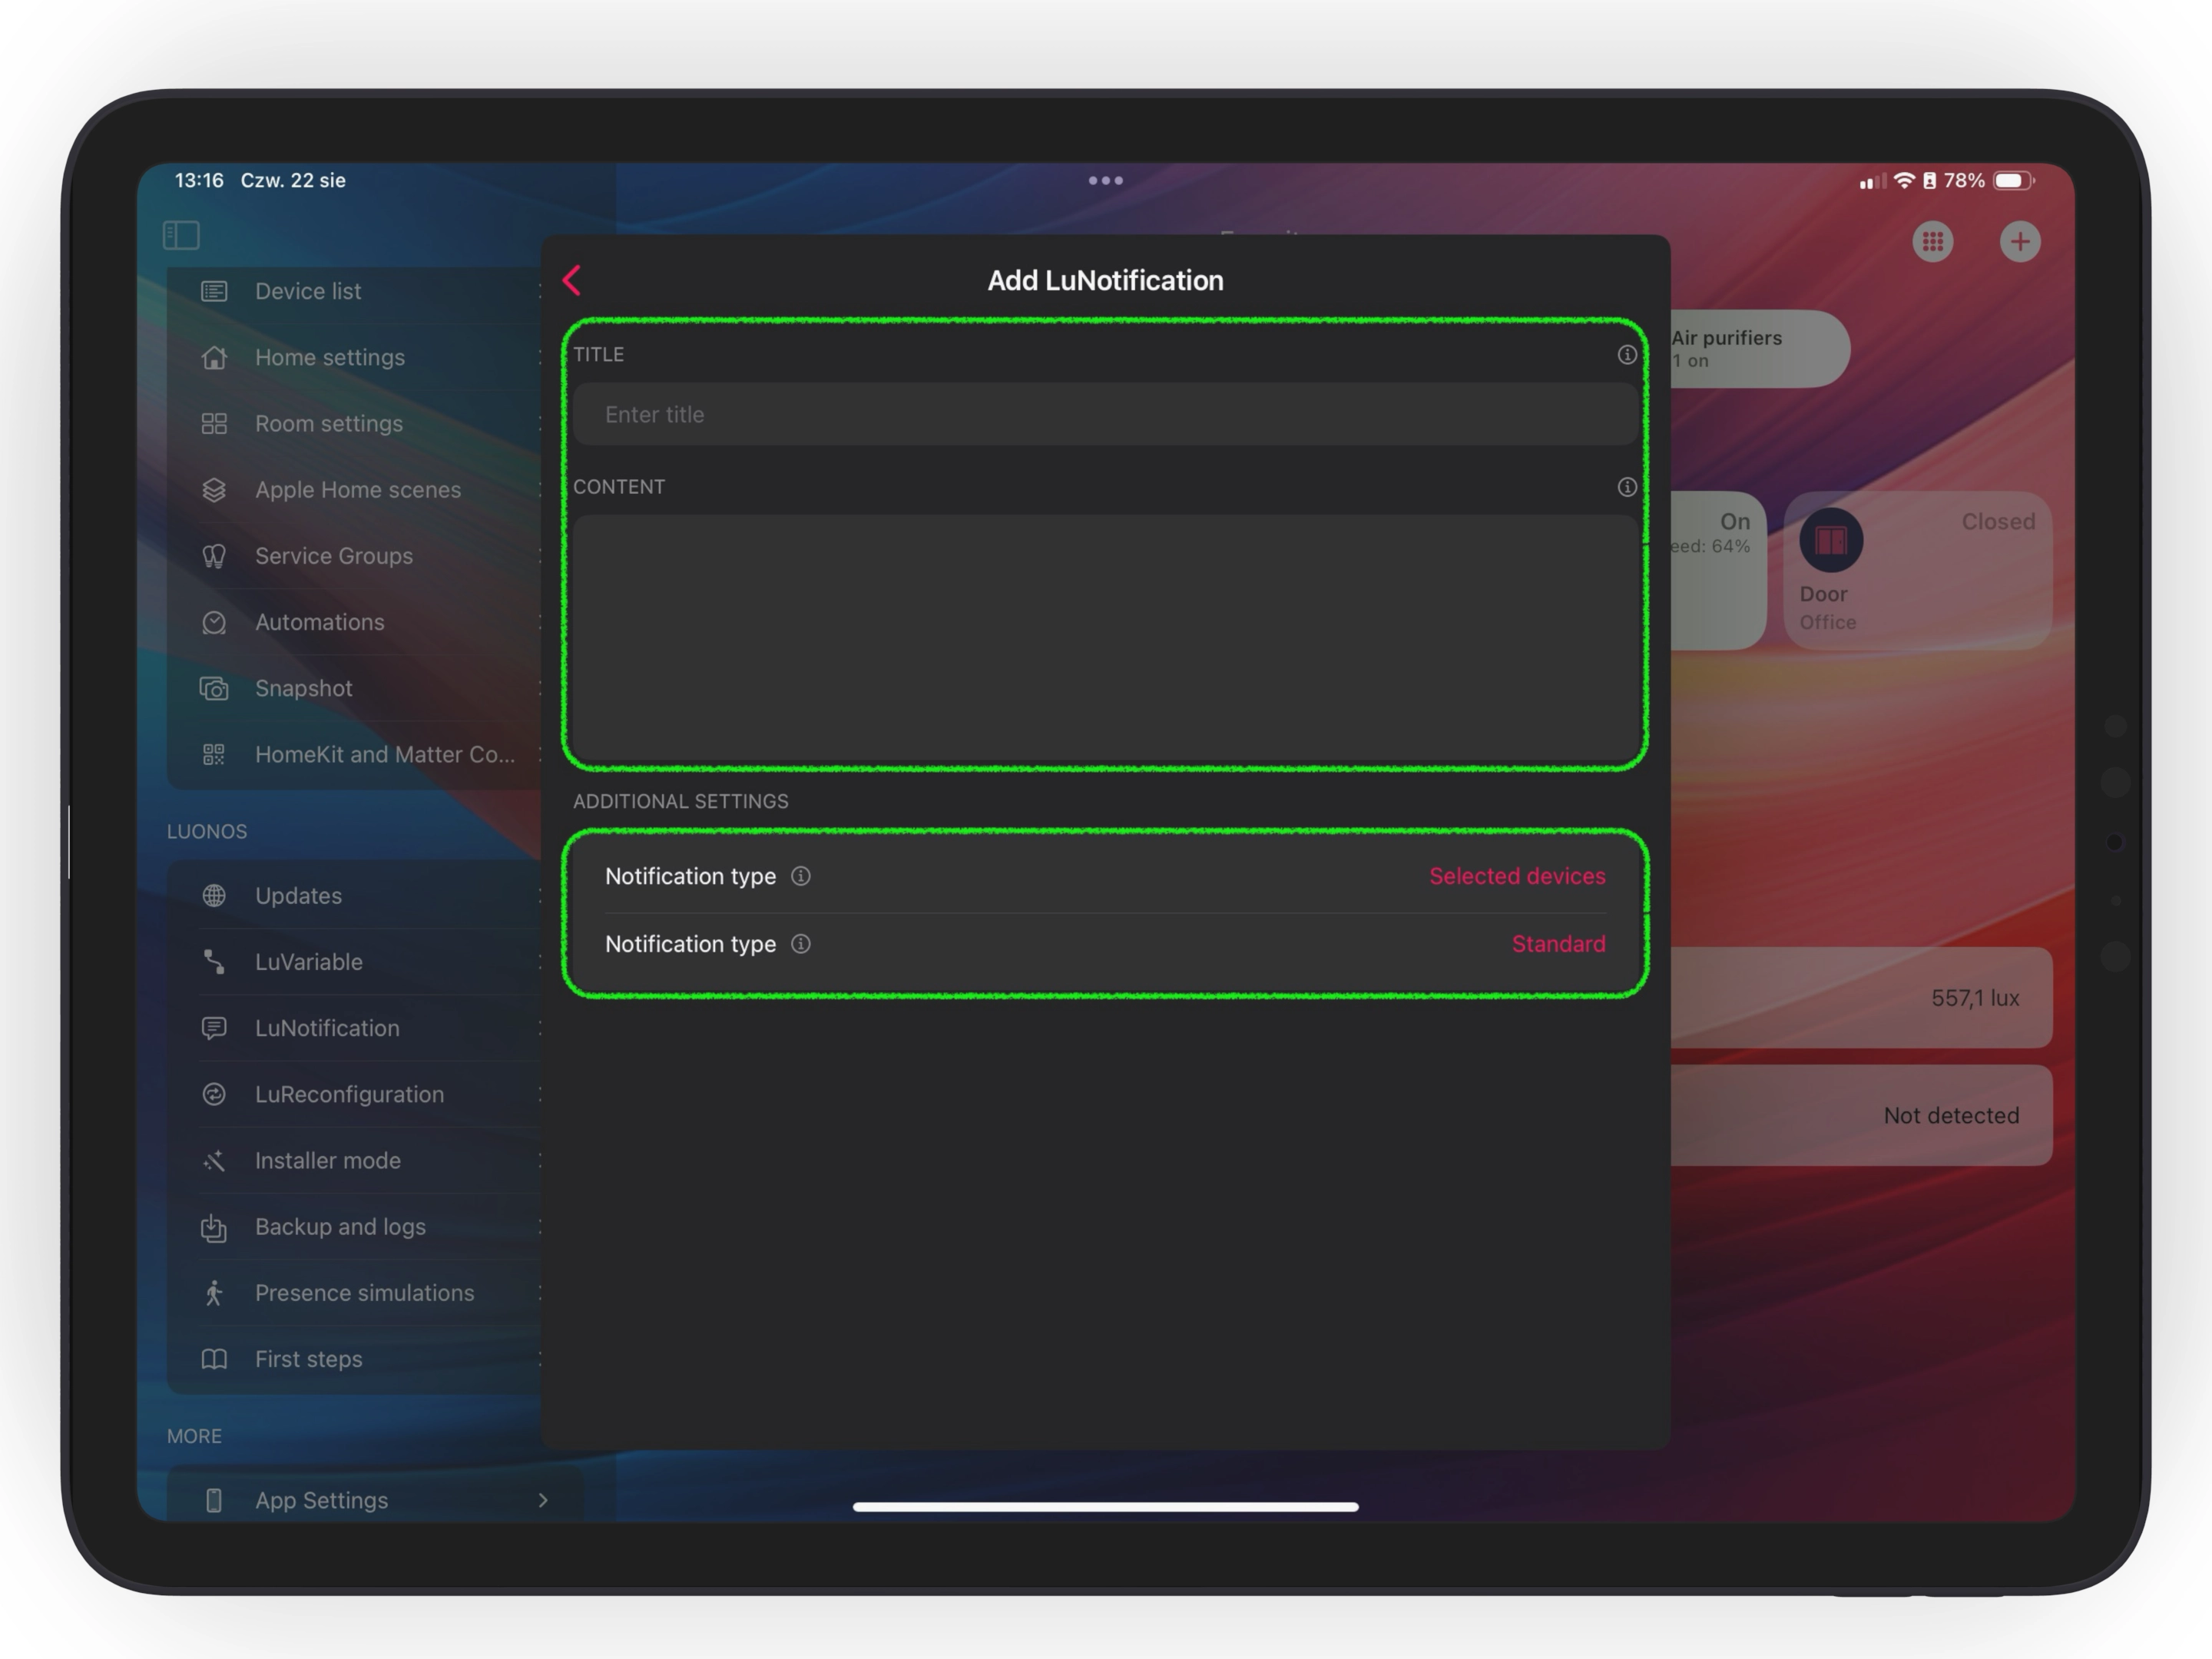
Notification types:
- Selected Device: The notification will appear in the notification list on every device that has access to your Apple Home via the LuHome app. If you share your home with someone and that person also uses the LuHome app, they will see this notification on their list.
- Individual: The notification will appear only on the device on which it was created. Perfect for creating private notifications that you want to keep private.
- Group: The notification will be sent to all users who have consented to receive group notifications (we will return to this later in the text).
Notification levels:
- Critical: Critical notifications are those that will reach you even when your device is in silent mode. The signal will be loud and clear, so you won't miss it. Use critical notifications only when the notification is really very important.
- Standard: Standard notifications are those you usually receive. They are not too intrusive, and if you have "Do Not Disturb" mode enabled, you will only be notified once it is turned off. This type of notification is suitable for low or standard priority notifications.
After creating the first notification, we can save it and move to the next steps.
Saving the notification and following steps
If we selected the "Selected Devices" type when creating a notification, a green "Add Device to LuNotification" button will appear just below the title and content. If we do not click this button, the notification will never reach our device. Why was it designed this way? The answer is simple. It allows you to decide whether the notification should be delivered only to your iPhone, or also to your iPad, or maybe other household members would also like to receive such a notification. In that case, they simply need to go to the LuNotification section, click on the notification they are interested in, and select that they want to receive this notification on their device.
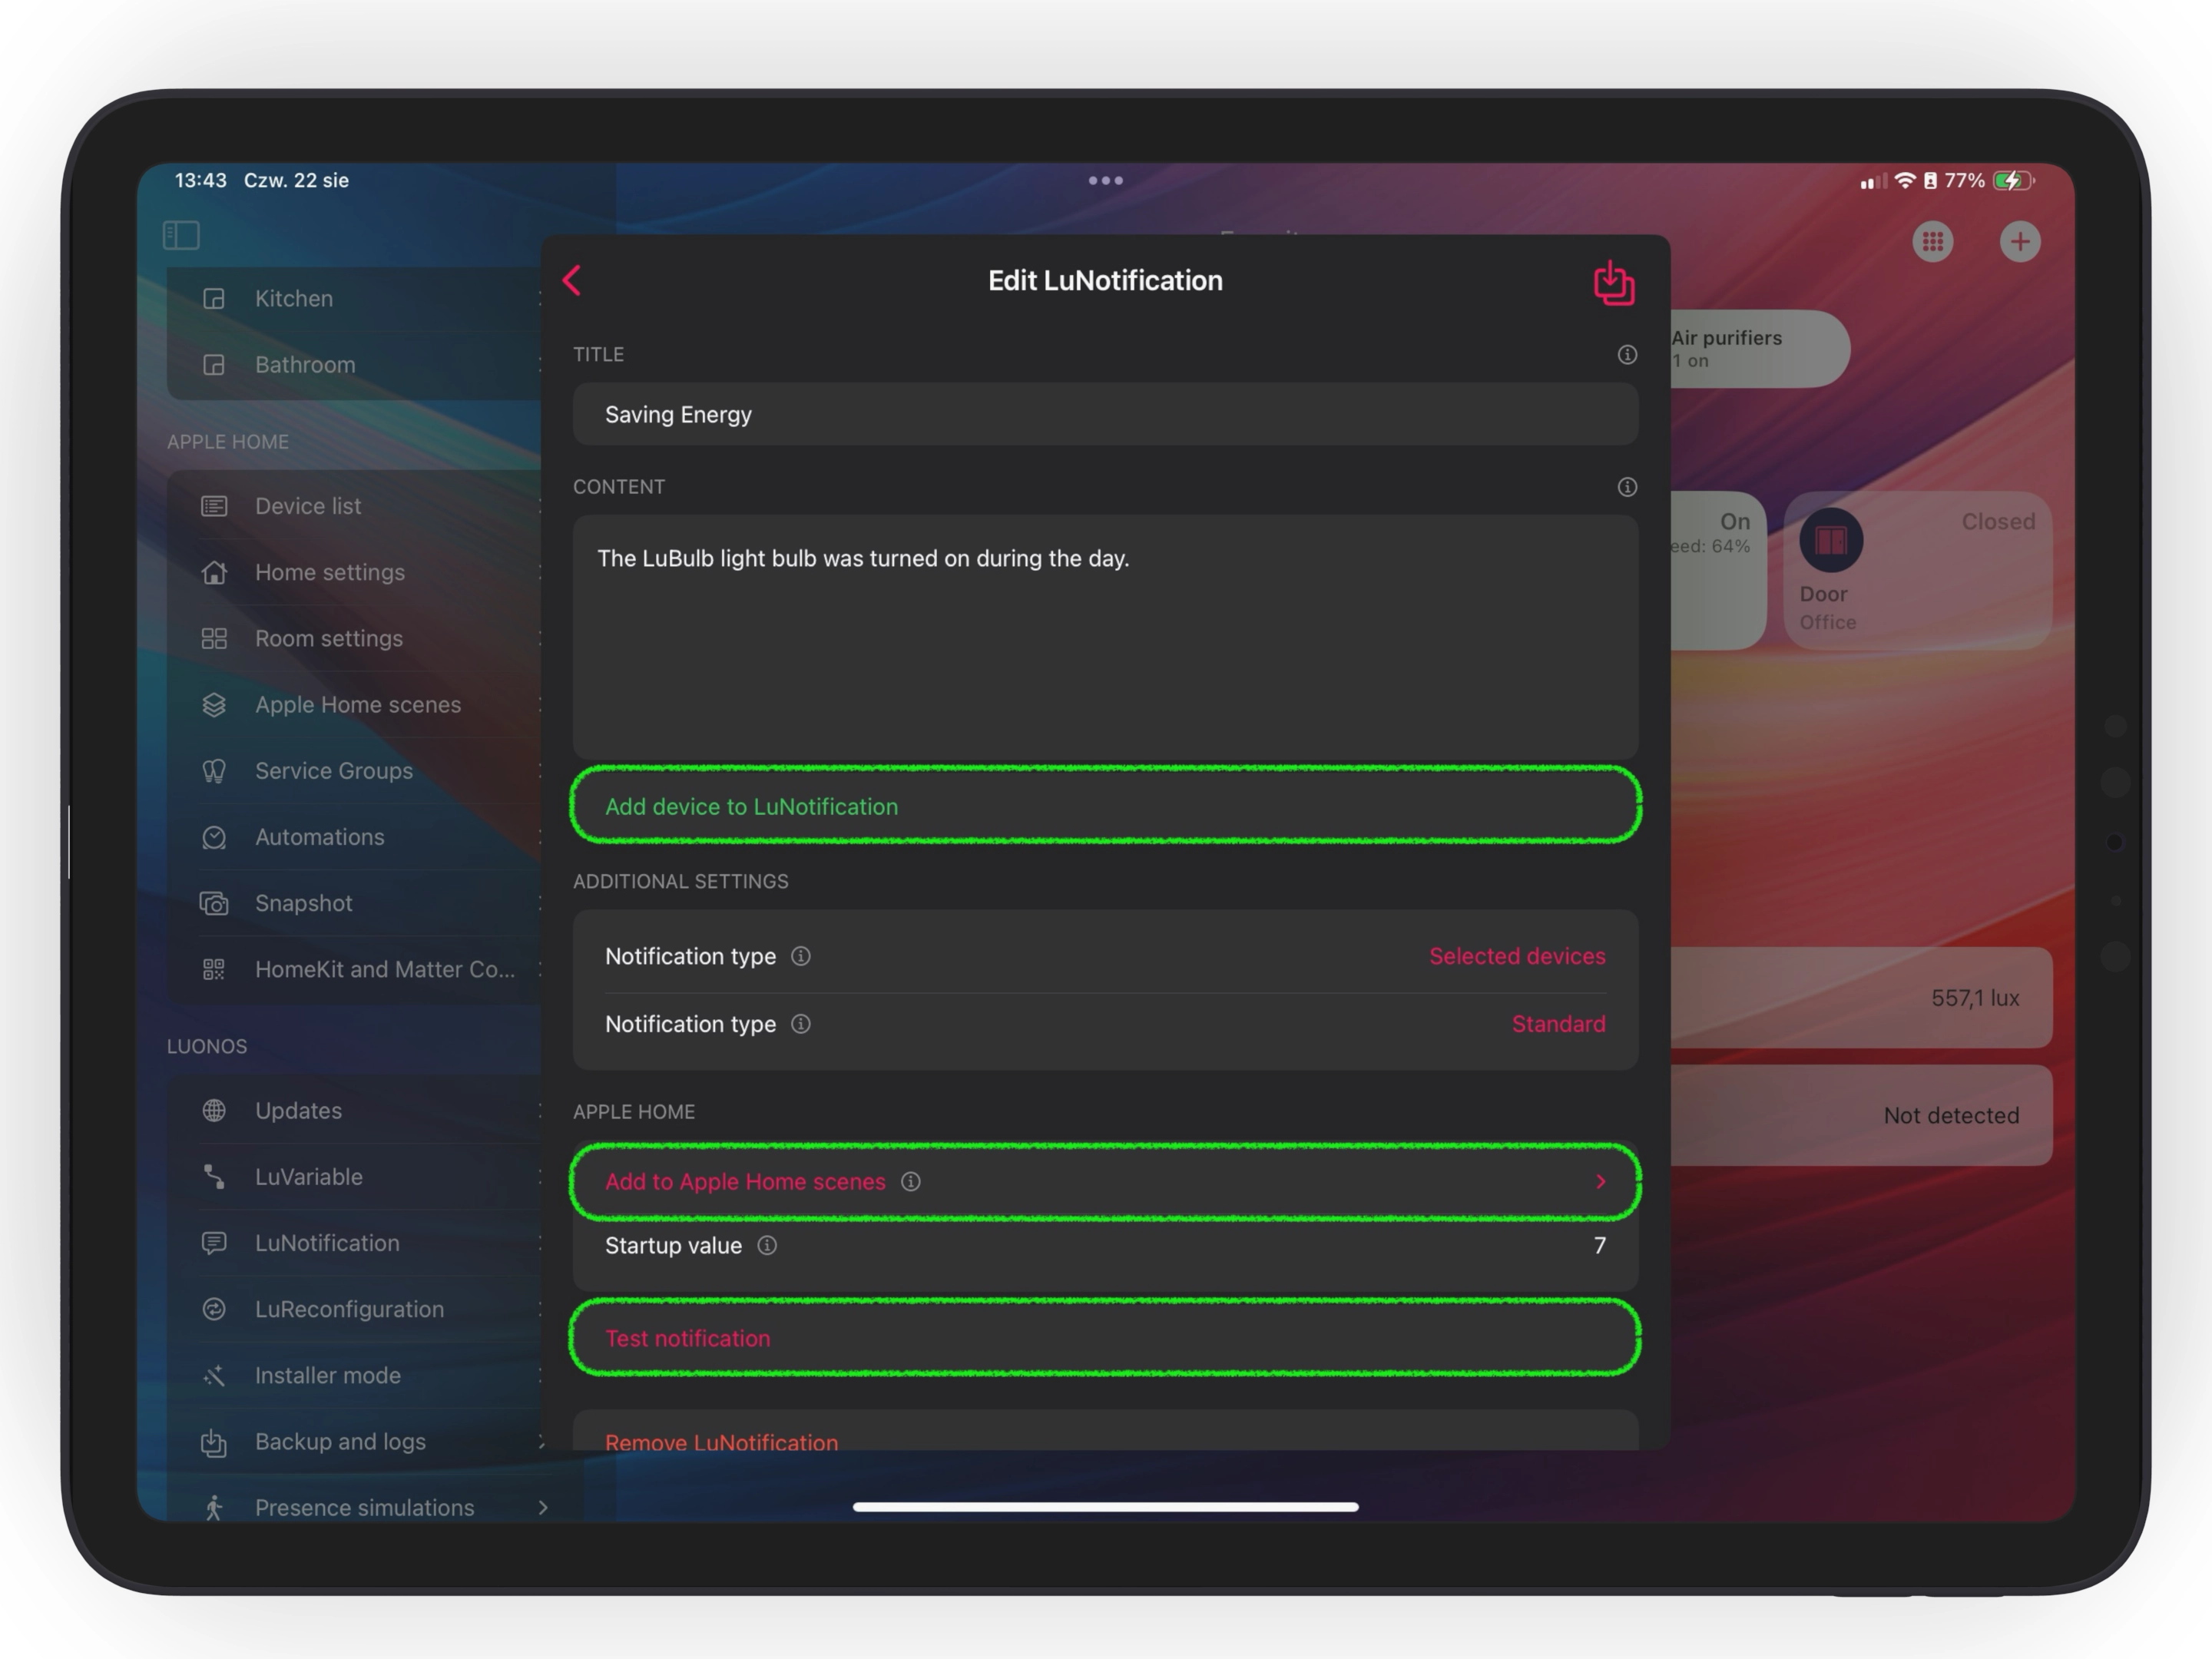
Below, there is another button that allows you to add the notification you created to Apple Home scenes. This is where the magic and power of LuNotification lies. Anything we can add to Apple Home scenes can be triggered using automations, for example, in the Home app. We will return to scenes and automations later in the text.
Further down, we can find the notification testing function. With a single click, we can check whether the notification we created is delivered to the selected device or devices.
Notification list
After we have set up everything we wanted, we can return to the screen with the notification list, as there are still two things that interest us there. The first are the icons on the left side of the notifications. They inform us whether the notification is a group notification (two green people), whether the notification will be delivered to this device (green checkmark), and whether the notification will not reach our device (red cross). This way, we can immediately see what is happening with our notifications and manage them conveniently.
The next section worth visiting is Settings. There, we will find two interesting features. One of them is system notifications. If we enable them, we will receive notifications about the luonOS system downloading a new update or restarting. However, more important is the section for group notifications. If we enable it, we will automatically receive all notifications marked as group notifications on the device where we enabled this option, even if they were created by another home user. Of course, if we do not want to receive such notifications, we do not need to enable this option.

Adding notifications to Apple Home automations
Since we have covered most of the important things by now, we can add our first notification to Apple Home automations.
So, we create a new notification:
- Title: LUON NOTIFICATIONS
- Content: More possibilities with the LuBase hub
- Notification Type: Selected Devices
- Notification Type: Standard
- Select: Add device to LuNotification
- Apple Home Scene: Add the notification to Apple Home scenes and name it "LuNotification"
If we have completed all the above steps, we go to the Apple Home app and click on "Add Automation." For testing purposes, we choose a contact sensor and set it so that something happens when the sensor is opened. Once we have set the automation trigger, we select the scene we named "LuNotification" as the final step. We save the automation, and it's done. Now, every time the sensor is opened, we will receive a notification with the content we set.
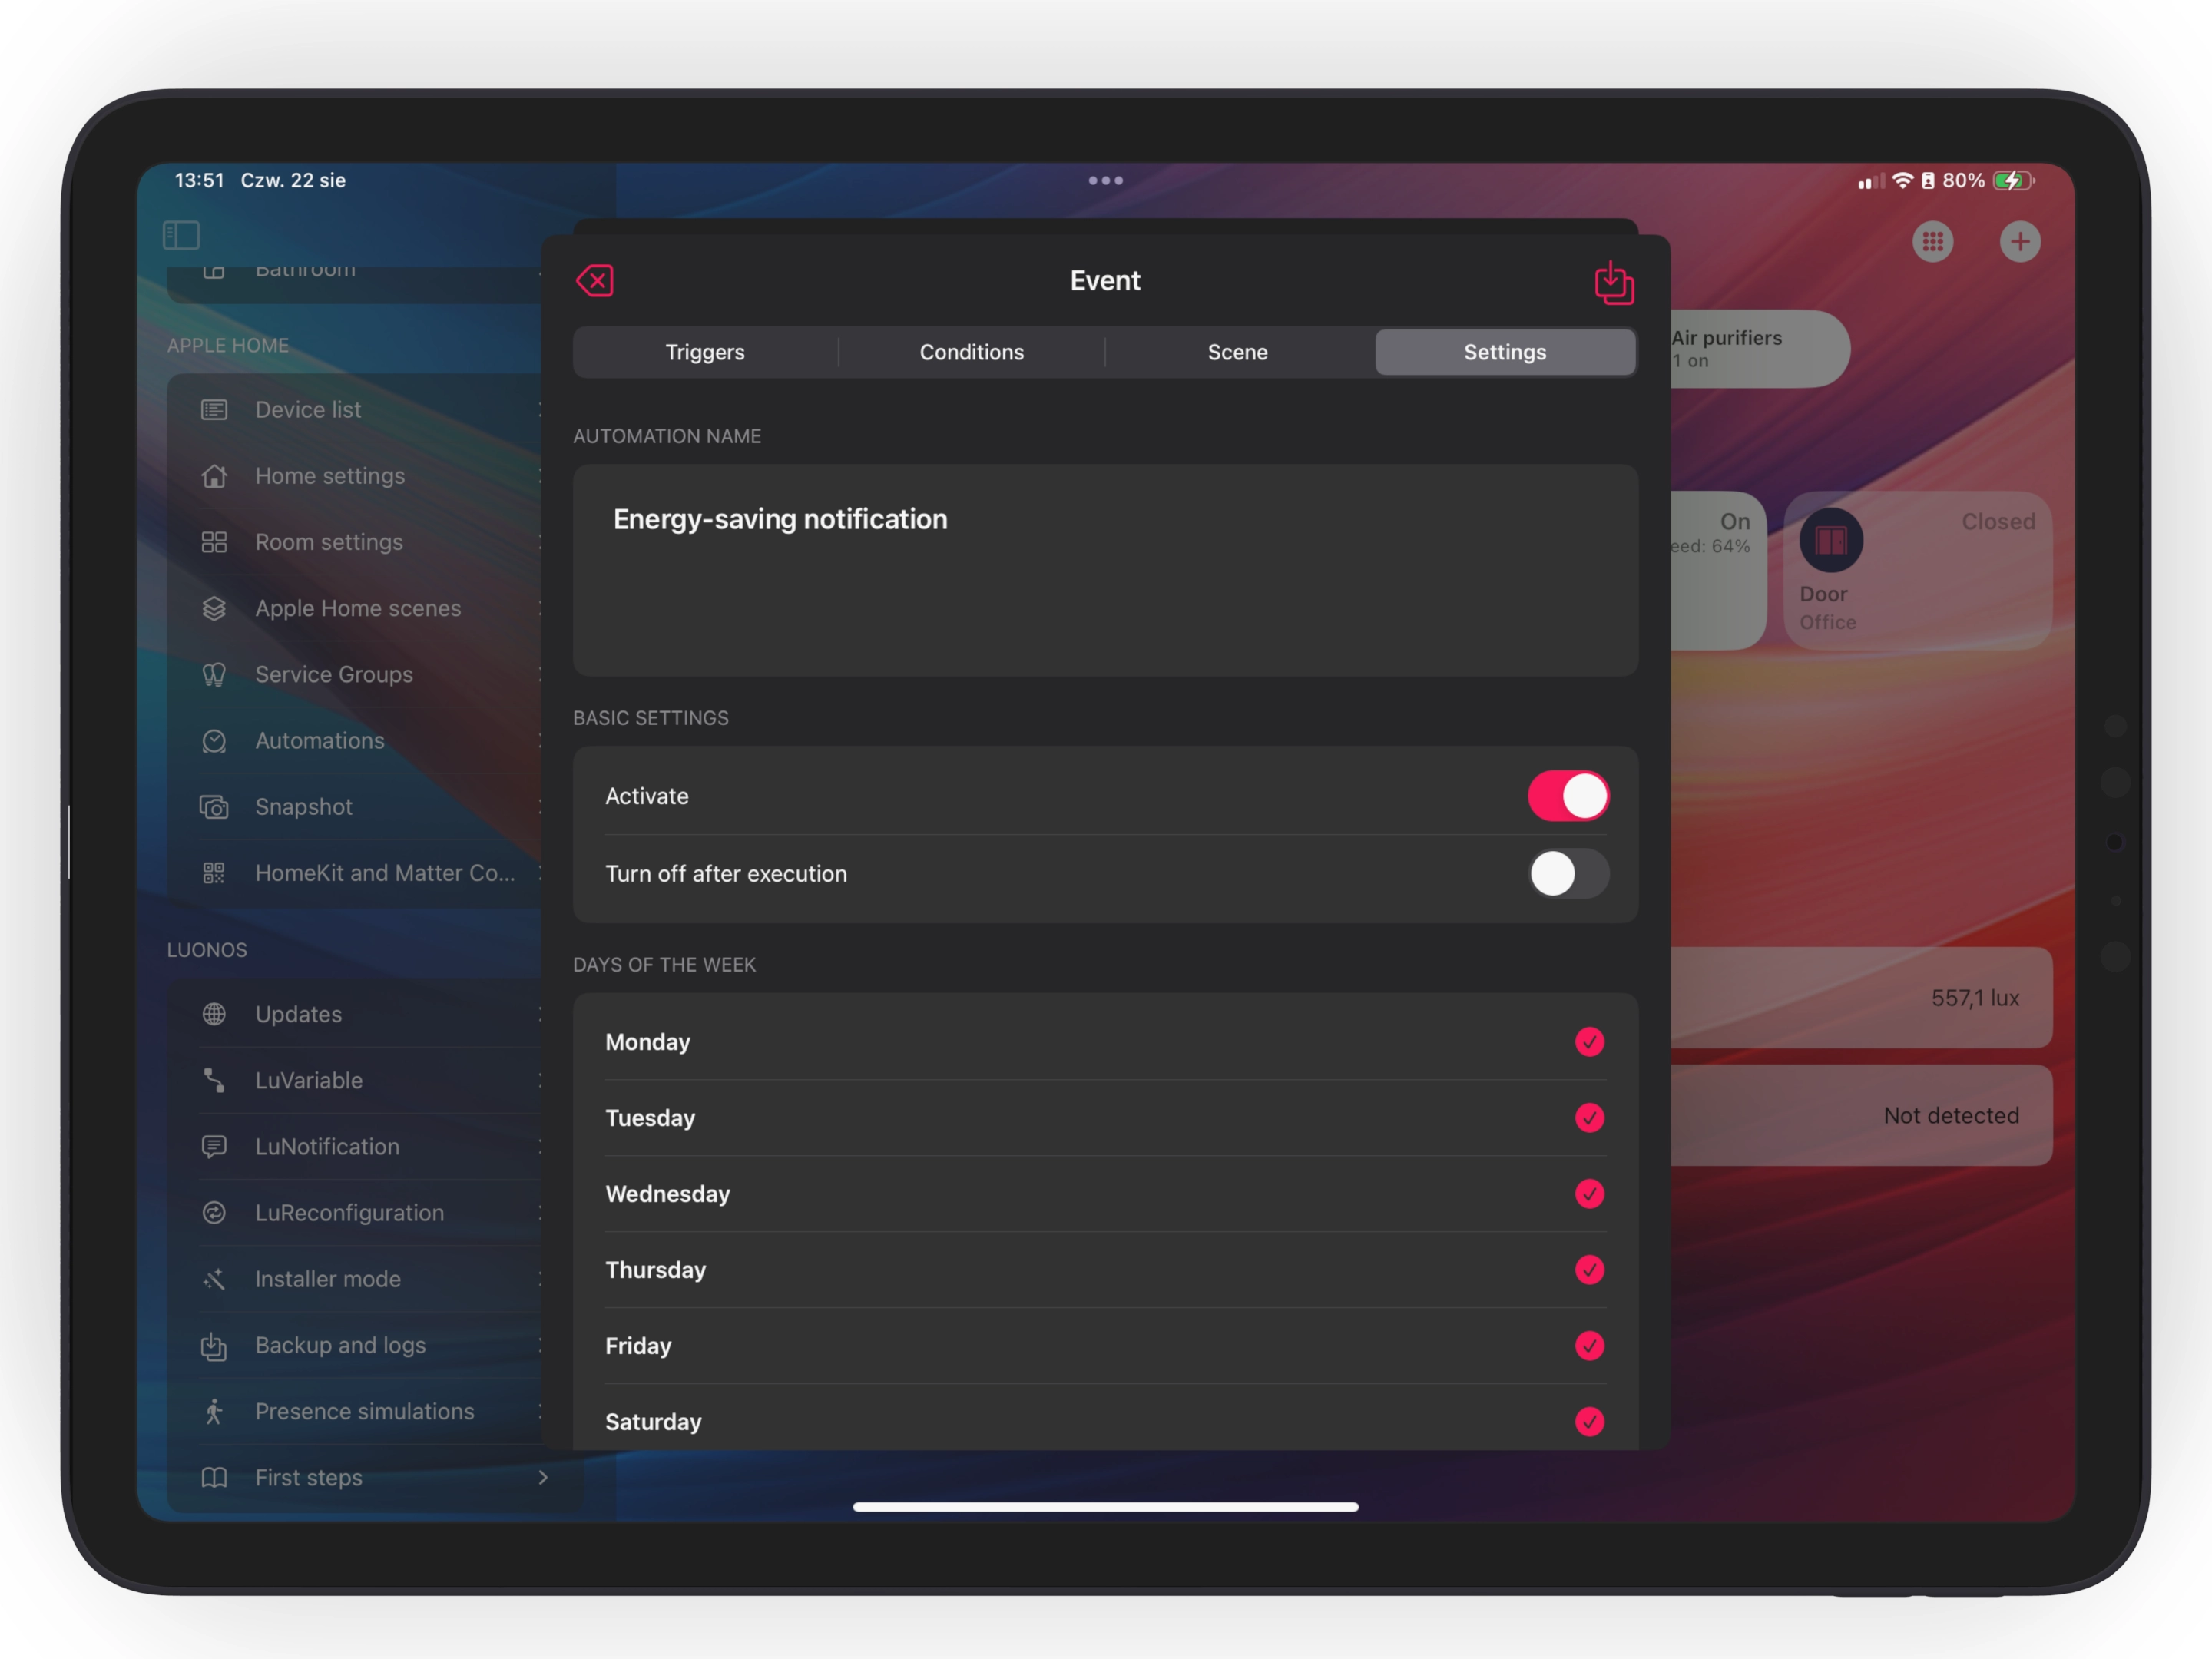
Of course, this is just one example, and the possibilities are truly numerous. For instance, we use a notification daily that informs us if someone forgot to close the door or if someone pressed the doorbell at the entrance. But you can create a notification to alert you to higher energy consumption than usual or if someone turns on the lights during the day.
Summary
Remember that you can use notifications with any devices compatible with Apple Home—they don't have to be exclusively our LuBulb. All you need to do is add the LuBase hub to Apple Home and configure everything in the LuHome app available on the App Store.
P.S. Once you create your first notifications, share them with our Facebook group. Any inspiration that helps us build an even better smart home will be very valuable to us.
